Building Skills, Building Community: Woodworking Basics with a 2×10 Bench
A place to sit might seem like a small thing, until you need one
The idea for our TCAP Denton community bench build started when I visited with my dog and noticed a need for seating. It became an opportunity to bring people together, teach practical woodworking skills, and make something useful for our neighbors.
At Roots & Boards, that is what a community build is about. We learn by doing, help each other along the way, and create something with a purpose beyond the workshop. Our bench project brings that approach to life using familiar materials: 2×10 lumber and a 2×4 frame.
Why a bench is a good project for learning
A bench introduces many of the skills that show up in other woodworking projects: reading measurements, marking cuts, checking alignment, assembling a frame, and preparing a surface for finish.
Each part has a purpose. The top provides seating. The legs support it. The frame beneath the seat helps connect the assembly, while a lower stretcher connects the leg assemblies and helps limit movement.
Understanding those jobs matters just as much as knowing how to operate a tool. We want participants to leave knowing why we made a choice and how to apply that thinking to another project.
Start with the wood you actually have
One of the first lessons in woodworking is that a board’s name does not tell you its exact dimensions. A typical surfaced 2×10 measures about 1½ inches thick and 9¼ inches wide. A typical 2×4 measures about 1½ inches by 3½ inches.
Measure your own boards before laying out a project. Two 2×10s placed side by side give you about 18½ inches of width before any gap, trimming, or additional detail.
We also look at the condition of the lumber. Is a board bowed or twisted? Does it have a split near an attachment point? Which face would work best for the seat? Learning to notice those things helps prevent problems later.
Measure, mark, and make a plan
Before cutting, identify each part and write down its finished dimensions. Labeling the seat boards, frame pieces, and leg components makes assembly easier to follow.
A tape measure and square are two of the most useful tools in the shop. The tape establishes the length; the square helps carry a clear line across the board. We also account for the saw blade’s width, called the kerf, and identify the waste side of the line.
Accurate work starts before the saw turns on. Taking a moment to check a measurement is part of the process, especially when several pieces need to match.
Build the frame and understand the connections
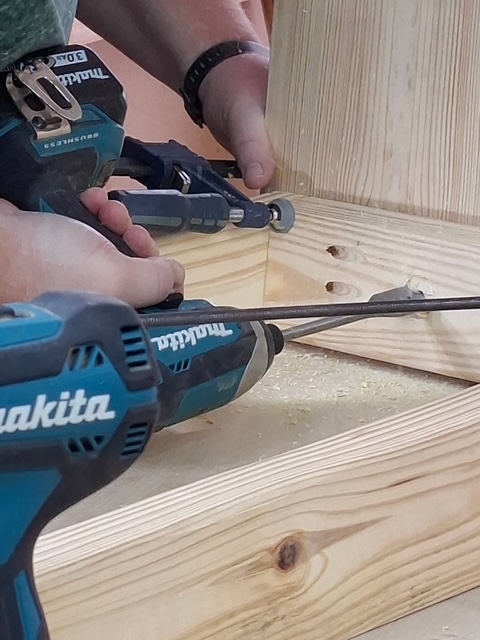
Our bench design uses a 2×4 frame underneath the seat. It gives participants a chance to learn how parts fit together and how to check an assembly before fastening it.
We dry-fit the pieces first, clamp them in position, and check the frame for square. Measuring both diagonals is a useful check: matching measurements help indicate that a rectangular frame is square.
Pocket-hole joinery is one of the techniques we explore. It allows screws to enter a mating piece at an angle, but successful joinery still depends on the right screw, jig setting, material thickness, and placement. Glue can help strengthen suitable wood-to-wood joints when the surfaces fit properly.
For a bench, every connection needs to suit the load it will carry. We talk through how the legs, frame, seat, and lower stretcher work together, and why simply adding more screws does not automatically make an assembly stronger.
Fit the legs and lower stretcher
Attaching the legs turns a collection of parts into something that starts to look like a bench. It is also a good time to slow down and check alignment.
The legs need to sit consistently, the seat needs to rest evenly, and the connections need to resist movement. The lower stretcher ties the leg assemblies together and provides another opportunity to discuss how bracing contributes to stability.
During our community build, participants get to see these choices take shape and ask questions as we work. That conversation is part of the learning.
Sand for the person who will use it
Sanding is about how the finished bench feels as well as how it looks. We pay particular attention to the seat, corners, and edges where someone’s hands or legs may touch.
We work through an appropriate grit sequence, ease sharp edges, and remove sanding dust before finishing. Eye protection, hearing protection when needed, dust control, secure workpieces, and instruction before using unfamiliar tools are part of the workshop process.
Before a bench goes into service, it needs a final check for stability, secure connections, exposed fasteners, and rough spots. Finish should suit its intended location and cure according to the product directions.
Process over perfection
Some people arrive with tool experience. Others are measuring, drilling, or sanding for the first time. Both belong here.
Our goal is to help people build confidence through practice. A question, a correction, or a second attempt can teach just as much as a step that goes smoothly. We take the work seriously while making room to learn.
That is the heart of Roots & Boards: hands-on learning that brings people together and gives those new skills somewhere meaningful to go.
Help us build what comes next
Our TCAP bench project connects beginner woodworking with a practical need in Denton. Every board measured, joint assembled, and edge sanded contributes to something our neighbors can use.
Want to be part of a future workshop or community build? Visit rootsandboards.org to learn about opportunities to participate, volunteer, or support our work. You can also help by sharing Roots & Boards with someone who would enjoy learning alongside us.
You do not have to arrive knowing how to build. You can start with a willingness to learn, and help us build from there.